I'm going to do something I've not done before - post a recipe without a picture. The picture came out so badly and, quite frankly, unappealing but the dish was so good that 1) I want a record of it so I can make it again and 2) you need to try it.
Awhile back, I bought a 2 pound package of lobster meat. Fully cooked, in small pieces. I used a large portion for the paella and still had a lot left. One of my favorite dishes is lobster ravioli, but I'd never made it before. I figured now was the time!
I based the sauce and ravioli filling off this recipe from Food Network. I did not make my own pasta but instead used wonton wrappers - feel free to make your own if you're braver than me. The link to the original has one.
To say this was delicious is a huge understatement. The sauce is SO GOOD. If you want to buy frozen ravioli and skip those steps all together, make the sauce for it! Jason just stood over the pan dipping bread into it after he ate.
Lobster Ravioli with Lobster Cream Sauce
Lobster Ravioli Filling:
1 tablespoon butter
1 clove garlic, chopped
1 tablespoon chopped shallots
16 ounces cooked lobster meat, cut into small pieces
2 ounces ricotta
Salt
Pepper
Lobster Cream Sauce:
1 tablespoon butter
1 tablespoon chopped shallots
4 ounces lobster meat (or crabmeat), cut into small pieces
5 ounces tomato sauce
10 ounces heavy cream
Salt
For the Lobster Ravioli: In a large saute pan, add the butter and melt. Add the garlic and shallots and saute until golden brown. Add lobster and saute 2 to 3 minutes. Let cool slightly. In a large bowl, combine lobster mixture and ricotta and mix well. Season with salt and pepper.
If working with wonton wrappers, put about a tablepoon of the lobster cheese mixture in center of wrapper. Wet edges and press closed with a second wrapper. Repeat until all mixture is used. Gently place ravioli in boiling water and cook for 6 to 8 minutes, or until al dente.
For the sauce: Using a 12-inch saute pan at medium heat, add butter and shallots and saute until shallots are translucent. Add the lobster meat and saute for about 2 to 3 minutes. Add the tomato sauce, cream, and salt and cook until it reduces half way and becomes creamy. Add the cooked ravioli to the sauce and let cook together for about 1 minute before serving.
Monday, October 31, 2011


Saturday, October 29, 2011
Spinach, Mushroom, and Pesto Lasagna

I made my own pesto because the grocery store wanted a pretty penny for storebought. If you pick up just enough pine nuts at the bulk section of your store, it's much more economical to make it yourself. I'll include the pesto recipe, too, just in case you don't have a favorite.
I found this meal through Pinterest (anyone surprised?) and it comes from this fabulous blog, The Other Side of Fifty.
Spinach, Mushroom and Pesto Lasagna
9 lasagna noodles (I used no-boil to save a step)
10 oz chopped frozen spinach, thawed and squeezed dry
1 3/4 cup ricotta cheese
1 large egg
1/2 tsp garlic powder
salt and pepper
1 TBSP olive oil
1 TBSP butter
2 cups diced onion
1/2 red bell pepper, seeded and diced (I skipped)
dash of crushed red pepper flakes
8 ounces of button mushrooms, coarsely chopped
2 cloves garlic, minced
2 TBSP all-purpose flour
1 1/2 cups whole milk
1 1/2 cups Half & Half
3/4 cup plus 2 TBSP basil pesto
12 oz mozzarella cheese (I used slices)
1/4 cup grated parmesan cheese
Preheat oven to 350 degrees. Spray a 9x13 baking dish with cooking spray.
In a separate baking dish place lasagna noodles and cover with boiling water. Let sit for 15 minutes while making the sauce. (skip if using no bake noodles)
In a medium size mixing bowl, combine the spinach, ricotta cheese, garlic powder and egg. Season well with salt and pepper. Set aside.
In a large skillet heat olive oil and butter over medium heat. Add the onions and bell pepper, season with salt, pepper and crushed red pepper flakes and saute until onions are translucent, 6-7 minutes. Add the mushrooms and continue to saute until mushrooms lose their moisture, another 5-7 minutes. Add the garlic and saute for another minute or two. Sprinkle the flour over the vegetables and stir to combine. Continue cooking and stirring over medium heat for two minutes. Add the milk and half & half, bring to a boil, reduce heat and simmer for 4-5 minutes until sauce has thickened a bit. Remove from heat and stir in 3/4 cup pesto. Taste to see if salt and pepper are needed.
Drain lasagna noodles.
Spoon 2 TBSP of the pesto on the bottom of the prepared baking dish. Lay three noodles on top of the pesto. Top with 1/3 of the basil cream sauce (about 1 1/2 cups) and spread to cover noodles. Dollop 1/3 of the ricotta mixture on top of the sauce, then top the ricotta with 1/3 of the cheese slices. Repeat layers two more times. Sprinkle parmesan cheese over the top. Cover tightly with aluminum foil and place dish in oven. Bake for 25 minutes, uncover, then bake for another 25 minutes, until bubbly and browned. Let dish sit for 10-15 minutes before serving.
Easy Basil Pesto (from Food Network.com)
2 cups packed fresh basil leaves
2 cloves garlic
1/4 cup pine nuts
2/3 cup extra-virgin olive oil, divided
Kosher salt and freshly ground black pepper, to taste
1/2 cup freshly grated Pecorino cheese
Combine the basil, garlic, and pine nuts in a food processor and pulse until coarsely chopped. Add 1/2 cup of the oil and process until fully incorporated and smooth. Season with salt and pepper.
Add all the remaining oil and pulse until smooth. Transfer the pesto to a bowl and mix in the cheese.
Friday, October 28, 2011
One-Pan Skillet Cookie

Who doesn't love a cookie, hot out of the oven? Especially when it's gooey inside and finished off with a scoop of vanilla ice cream?
I adore cookies but I don't adore the measuring cups, mixing bowls, cookie sheets, scooping, wire racks, etc. that making a batch requires.
This recipe eliminates it all. You get a warm, gooey cookie with NO EXTRA PANS. Just a measuring cup or two.
I found this recipe linked on Pinterest (to this blog) and wasted no time in trying it. It takes basic ingredients I always have on hand and it's so dang easy! This was a great treat to console ourselves with last night while watching the extremely stressful Rangers game.
Mine took longer than 15 minutes - closer to 20. Just keep an eye on it.
Make it tonight!
One-Pan Skillet Cookie
1 stick (8 tablespoons) butter
1/2 cup granulated sugar
1/2 cup light brown sugar
1 teaspoon pure vanilla extract
1 egg
1 1/2 cups all-purpose flour
1/2 teaspoon baking soda
1/4 teaspoon kosher salt
1 cup chocolate chunks
Preheat oven to 350 degrees. Melt butter in an 8 inch cast iron skillet set over medium-low heat. Stir in sugars and vanilla and remove from heat. Let rest until pan is warm, but no longer very hot, about 5 minutes.
Crack an egg onto the butter and sugar mixture, and use a fork to whisk it well into the mixture. Place flour, baking soda, and salt on top, and very carefully stir into the mixture until smooth and well-mixed. Stir in chocolate chunks. Place in the oven for 15 minutes, or until starting to turn golden on the top and around the edges, but soft in the center. Serve with vanilla ice cream.
Thursday, October 27, 2011
Pineapple Shrimp Fried Rice

Imagine my excitement when a friend recommended a great blog, Rasa Malaysia, who had this recipe in her archives!
Mine is quite colorless but let's face it, yellow/beige food is always the tastiest anyways... And super fast! Start to finish, 10 minutes maybe?
Pineapple Shrimp Fried Rice
8 oz. leftover rice
2 cloves garlic (finely chopped)
4 oz. pineapple (cut into small pieces)
4 oz. shrimp (shelled and deveined, leave whole or cut into small pieces)
2 tablespoons cashew nuts (optional)
1 teaspoon shrimp paste (if you can't find it, use extra fish sauce)
1 tablespoon fish sauce
1/2 tablespoon pineapple juice
1/4 teaspoon dark soy sauce (for coloring)
1 fresh red chili (seeded and cut into small pieces) - I skipped
2 tablespoons oil
Heat up a wok and add cooking oil. Stir-fry garlic, red chili, and shrimp paste until aromatic. Add shrimp and stir-fry until half-cooked. Add rice, pineapple pieces, pineapple juice, and do a few quick stirs. Add fish sauce and dark soy sauce to blend well with rice. Stir-fry for another minute or so, dish out and serve immediately.
If you have cashew nuts, add them towards the end of the cooking process.
Tuesday, October 25, 2011
Huli Huli Chicken (crockpot)

Thankfully, I finally got tired of takeout and hit the store on my way home from work yesterday. Even thought I had to endure the 5pm grocery shoppers, it felt so nice to have a plan for meals the rest of the week.
I found this recipe through a blog I follow, What's Cooking Chicago? Such a simple, easy, crockpot meal sounded perfect for a weeknight! This dish was tasty; now, I won't lie and say it was the best meal ever - that spot is usually held for my beloved ethnic foods - but it was inexpensive, easy, filling, and crowd pleasing.
Joelen added sliced bell peppers for color and texture; I went with just chicken. I'll include her instructions for including the peppers as well.
Huli Huli Chicken
2/3 cups crushed pineapple, undrained
1/2 cup packed light brown sugar
1/2 cup ketchup
1/4 cup fresh lime juice
1/4 cup soy sauce
6 garlic cloves, minced
2 tablespoons minced or grated ginger
4 pounds bone-in, skin-on chicken pieces (I used less - about 2 pounds)
1 1/2 cup chopped mixed bell peppers (optional)
Simmer crushed pineapple, brown sugar, ketchup, lime juice, soy sauce, garlic and ginger in medium saucepan until thickened and measures 1 1/2 cups, about 10 minutes. Season with salt & pepper.
Coat slow cooker with cooking spray. Transfer 1/2 cup sauce to slow cooker, reserve remaining. Season chicken with salt & pepper, add to slow cooker and coat evenly with remaining sauce. Cover and cook until chicken is tender, 4 to 6 hours on low.
About 30 minutes before the chicken is done, heat a skillet over medium high heat. Add oil and when hot, add bell peppers. Sauté peppers until slightly softened and then transfer to the crockpot. Stir to combine and allow to finish cooking with the chicken.
Monday, October 10, 2011
Shrimp & Grits

I did tweak it a bit, and my changes are below. Check out the original if you're interested. This was a quick weeknight meal and totally hit the spot. Tasty and easy!
Shrimp & Grits
Grits
1 cup quick cooking grits
1 cup grated sharp cheddar
1 tablespoon butter
1 jalapeño, seeded, diced
1/4 cup heavy cream
Kosher salt, freshly ground pepper
Shrimp
4 slices bacon, diced
3 garlic cloves, sliced
2 tablespoons (1/4 stick) butter, divided
1 pound shrimp, peeled and deveined
1/4 cup beer
1/4 cup chicken stock
1 tablespoon chopped fresh tarragon
Bring 3 cups water to a boil in a large saucepan. Gradually whisk in grits. Turn heat to low; gently simmer until grits begin to thicken (about 5 minutes). Stir in cheese, butter, and jalapeño, then cream. Season with salt and pepper. Keep warm.
Meanwhile, heat a large heavy skillet over medium heat. Add bacon pieces and cook until crispy. Add garlic and 1 tablespoon butter; stir until butter melts. Add shrimp. When garlic begins to brown, add beer and chicken stock. Simmer until shrimp is cooked through and the sauce cooks down a bit, about 4 minutes. Remove skillet from heat; set aside.
Divide grits among bowls, forming a well in center. Spoon shrimp mixture into center of grits. Sprinkle tarragon over.
Sunday, October 9, 2011
Dr Pepper Ribs

These ribs are from the blog, The Homesick Texan, and use the Texas favorite Dr Pepper as it's base. I adjusted the spice a little so ours were very tame. They are sweet, sticky, and delicious!
I used baby back ribs and ours fell off the bone - I ate mine with a fork! We both loved this recipe. It was simple to make on a lazy Sunday afternoon and the only item I had to buy at the store were the ribs and Dr Pepper - everything else are pantry staples for us. Love recipes like that!
Dr Pepper Ribs
For the rub:
1/4 cup of salt
1/4 cup of black pepper
1/4 cup of brown sugar
4 teaspoons of mustard powder
1/2 teaspoon of cayenne
2 teaspoons of chipotle powder
1/2 teaspoon of allspice
For the glaze:
2 cups of Dr Pepper (not diet!)
1 cup of ketchup
1/2 cup of mustard
1/4 cup of apple cider vinegar
2 tablespoons of molasses
2-4 teaspoons of chipotle powder
Two racks of St Louis ribs (we used Baby Back)
1/4 cup of Dr Pepper
Coat the ribs with the rub, wrap in plastic and place in the refrigerator for at least four hours.
Heat the oven to 300 degrees and bring the ribs to room temperature.
In a foil-lined large baking or roasting pan, arrange the ribs with the meat side up, pour in 1/4 cup of Dr Pepper, cover pan tightly with foil and place in the oven.
Meanwhile, place all the glaze ingredients in a pan, bring to a boil and then simmer for 20 minutes until thick and syrupy.
After an hour and a half, take the ribs out of the oven and spread some of the glaze on each side of the racks. Place back in the oven, meat side up and cook uncovered for 30 minutes.
After 30 minutes, take out the ribs and spread more glaze over them and cook for 30 more minutes or until ribs are desired tenderness.
At this point, take the ribs out of the oven, spread more glaze on them and then cook each side under the broiler for four minutes.
Thursday, October 6, 2011
My new favorite chocolate chip cookies

They are soft but not mushy, and the outside still has bite to it. I also thought they had a slight salty undertone which I love in a CCC. They bake up nice and thick!
I should have made more to freeze!
Chocolate Chip Cookies
2 2/3 cups all purpose flour
1 tsp baking powder
1 tsp baking soda
1 tsp salt
1 cup unsalted butter, at room temperature
1 cup granulated sugar
1 cup firmly packed light brown sugar
2 large eggs
2 tsp vanilla extract
2 cups semisweet chocolate chunks or chips
1 cup chopped walnuts, toasted (I used pecans)
Sift the flour, baking powder, baking soda, and salt into a medium bowl.
In a large bowl, using an electric mixer on high speed, cream the butter until fluffy and pale yellow. Add the granulated sugar and brown sugar and continue beating until the mixture smooth and sugar is mostly dissolved. Add the eggs and vanilla and beat on low speed until blended, occasionally stopping the mixer and scraping down the sides of the bowl with a silicone spatula as needed.
Add the flour mixture to the butter mixture and mix on low speed or stir with a wooden spoon just until blended. Add the chocolate chunks and walnuts, if using, mixing or stirring until blended. Press plastic wrap onto the dough, and refrigerate 24 hours.
Once 24 hours have passed, preheat the oven to 350. Using a cookie scoop, or dampened hands, shape the dough into 1-inch balls, and place on ungreased cookie sheets, about 2 inches apart. Bake the cookies until golden brown around the edges, about 12 minutes (or 8-9 minutes if using a smaller scoop). Let the cookies cool briefly on the pans on wire racks before transferring them to the racks to cool completely.
Tuesday, October 4, 2011
Bacon Burgers with Bacon Onion Balsamic Jam

It was delicious - truly, a delicious burger. The (raw) bacon mixed into the ground beef kept it juicy and added loads of flavor. The jam on it's own was tasty and it was the perfect topping for a burger straight off the grill.
You should make these.
This recipe is from Annie's Eats (originally from Fine Cooking) - I included my changes below
Bacon Burgers with Bacon Onion Balsamic Jam
For the topping:
4 thick slices bacon, chopped into ½-inch pieces
1 large yellow onion, thinly sliced
Kosher salt and ground black pepper
1/3 cup balsamic vinegar
½ tsp. Dijon mustard
1/3 cup water
For the burgers:
2 thick slices bacon
1½ lbs. ground beef (85% lean)
½ tsp. Worcestershire sauce
1 tsp. kosher salt
½ tsp. ground black pepper
4 slices thinly sliced smoked gouda cheese
4 hamburger buns, split
To make the topping, place a large skillet over medium heat. Cook the chopped bacon until lightly browned but not yet crisp, about 8 minutes. Transfer the bacon to paper towels to drain. Drain all but 2-3 tablespoons of the bacon grease from the skillet. Add the onion to the skillet, season with salt and pepper, cover the pan and cook for two minutes. Uncover the pan, add a splash of water and scrape any browned bits from the bottom of the pan. Cover and cook, stirring occasionally, until the onions are soft and beginning to brown, about 10 minutes.
Stir in the vinegar, mustard, and water. Return the bacon to the pan and bring the mixture to a simmer. Simmer uncovered until the mixture has thickened and most of the liquid has been absorbed, 2-4 minutes. Transfer to a small bowl and let cool slightly. Cover and refrigerate if making in advance.
To make the burgers, finely mince the bacon. Add to a bowl with the ground beef, Worcestershire, salt, and pepper. Mix well. Divide into four equal portions and form into patties about ¾-1 inch thick.
Heat a grill to medium-high heat. Grill to desired doneness, about 4-5 minutes per side depending on preference and grill temperature. When the burgers are almost finished cooking, top with the cheese. Lightly butter each bun and toast on the grill. Assemble the burgers on the toasted buns and topped with the onion jam.
Monday, October 3, 2011
Homemade Potato Chips

Tonight we had bacon cheeseburgers with bacon balsamic onion jam (amazing - will post tomorrow!) so I served these with them. We both loved them!
To get these thin enough, you'll want to use a mandoline. Or have mad knife skills.
This recipe is from the latest Bon Appetit magazine.
Homemade Potato Chips
5 Yukon Gold potatoes
Vegetable oil (for frying)
Kosher salt
Using a mandoline, thinly slice potatoes (just under 1/8" thick). Let soak in a bowl of warm water for 5 minutes. Drain. Pat potatoes until very dry.
Meanwhile, pour oil into a large pot to a depth of 1 1/2". Attach a deep-fry thermometer to side of pot; heat oil over medium heat to 320°. (I don't have a thermometer; I just wing it)
Working in batches of about 20 slices and returning oil to 320° after each batch, fry potatoes, stirring gently, until they are golden brown and oil stops sizzling, 3–4 minutes. Using a slotted spoon, transfer chips to paper towels to drain. Season each batch generously with salt.
*Make these into salt and vinegar chips by also sprinkling the chips with vinegar powder (1/4 tsp per batch of 20).
Saturday, October 1, 2011
Peanut Butter Dog Treats

They were super easy - and I appreciated that they called for basic pantry ingredients. I doubled the recipe and threw in batches while I cleaned house. Jason wandered out around 1:30 a.m. and asked why the house smelled like peanut butter :) All three dogs got a small one last night and judging by how fast they were consumed, I think they were a hit! I also had an audience while photographing them today - they seem to always know when something is for them, doesn't they?
When you have some time, make a batch of these for your favorite canine. If you're feeling fancy, you could melt down some carob chips to drizzle/dip them in. I'll probably use this basic recipe to make large batches for Christmas gifts for all the dogs in my life and dress them up some. For now, my pampered pooches are quite happy with the way they are.
Peanut Butter Dog Treats
1/2 cup creamy peanut butter
2 Tbsp vegetable or canola oil
1 cup water
1 1/2 cup whole wheat flour
1 1/2 cup all-purpose flour
In a large bowl, mix together the peanut butter, oil, and water until smooth (a whisk worked best). Add the flours and work them in with a spatula or your hands until the dough is smooth. Form the dough into a ball and wrap in plastic. Refrigerate for 30 minutes.
Preheat your oven to 350 F and line a few baking sheets with parchment paper, or spray them down with Pam. Roll out the chilled dough to about 1/4" thickness and use a cookie cutter to cut out as many shapes as you can. Bake the cutouts until firm and set (mine took about 12 minutes), then cool on wire rack. Once cooled, store in an airtight container.
Friday, September 23, 2011
Paella

However, our local Albertsons is closing and all their spices are clearancing out. I completely lucked out and found saffron for $4 a bottle! I bought a couple of bottles and immediately started marking saffron based meals to try. Paella being the first.
I can't account for how authentic this really is, though it tasted the same as I remembered it in NYC. I found the original recipe on All Recipes but made a few changes along the way just to suit our taste. If you have the saffron, it's actually an easy, quick meal that makes a large portion. Delicious!
Paella
1-1/4 cups uncooked white rice
3 cups chicken stock, divided
2 cloves garlic
1 teaspoon chopped fresh parsley
1/4 teaspoon curry powder
3 saffron threads
Salt and ground black pepper to taste
2 tablespoons olive oil
1/2 onion, diced
1 boneless, skinless chicken breast, cubed into small pieces
1 pound peeled and deveined small shrimp
3 small lobster tails, or 1/2 pound lobster meat
8 ounce fresh mushrooms, sliced
*you can always add clams and mussels
Rinse the rice with cold water; drain; set aside. Bring the chicken stock to a boil in a saucepan over medium-high heat, reduce the heat to low, cover, and keep warm. Work the garlic, parsley, curry powder, saffron threads, salt, black pepper, and 1/4 cup of the hot chicken stock together with a mortar and pestle until a smooth liquid forms; set the seasoning liquid aside.
Heat the olive oil in a paella pan over medium-high heat; cook and stir the onion until lightly browned. Stir in the chicken, shrimp, and lobster; cook and stir until the chicken is no longer pink in the center, about 10 minutes. Pour in the seasoning liquid.
Stir in the rice, pour in the hot chicken stock, and simmer until the rice is nearly tender, about 15 minutes. Add mushrooms; stir two times, and simmer for 10 minutes. Remove from heat; cover and let stand until rice is soft and flaky, about 7 minutes.
My changes: my lobster meat was already cooked so I added it with the mushrooms. I also browned some Italian sausage I had in the fridge along with the onion. I don't have a paella pan so I used a regular pan. My stove cooks hotter than most so just keep an eye on your rice; it might finish sooner.
Wednesday, September 21, 2011
Cajun Tilapia with Praline Sauce Over Dirty Rice

Let me tell you, he totally missed out. I'm sure it was tasty without the pecans but the pecans took this dish to a whole other level. The sweet and spicy, along with the crunch, work great together. I'm fairly sensitive to spice and didn't find this hot at all - you could always up the heat easily if that's your thing. I'm not even normally a sausage eater and it was delicious in this dish.
The original recipe calls for halibut but it was ridiculously expensive so I went for the basic, ever versatile, and cheap tilapia. Worked great! This meal actually comes together in less than 30 minutes. While the rice cooks, you can easily whip up the praline sauce and grill the fish. Great for a weeknight, but nice enough for a dinner guest.
Cajun Tilapia with Praline Sauce Over Dirty Rice
For the dirty rice:
1 link Italian sausage, casing removed (I used more than that)
1 tbsp. olive oil
½ cup diced onion
¼ cup diced red bell pepper
2 cloves garlic, minced
¾ cup long grain white rice
1½ cups low-sodium chicken or veggie broth
Salt and cayenne pepper, to taste
½ cup chopped scallions
For the praline sauce:
½ cup chopped pecans
2/3 cup sugar
1/3 cup water
Pinch of coarse salt
1 tbsp. unsalted butter, at room temperature
1 tbsp. whiskey (or apple juice) (I used bourbon, actually, all I had!)
For the fish:
2 tbsp. olive oil
1 tbsp. smoked paprika
2 tbsp. fresh thyme
2 tsp. garlic powder
1 tsp. kosher salt
1 tsp. black pepper
4-6 tilapia fillets (1-1.5 pound)
Preheat the grill to medium-high.
To make the dirty rice, crumble the sausage into a skillet or large saucepan over medium-high heat. Cook until starting to brown, 2-3 minutes. Stir in the olive oil, onion, bell pepper and garlic. Cook until just softened, 2-3 minutes more. Stir in the rice and cook for 1 minute. Mix in the broth. Bring the mixture to a boil, reduce the heat to a simmer, cover and cook until the rice is tender, about 20 minutes. Season to taste with salt and cayenne pepper. Stir in the scallions. Fluff with a fork and serve.
While the rice is cooking, make the praline sauce. Toast the pecans in a small saucepan over medium heat, stirring occasionally, until golden and fragrant, about 3-4 minutes. Transfer the pecans to a plate and set aside. Return the pan to medium heat. Combine the sugar and water, bring to a simmer, lower the heat and cook until reduced by about half, about 5 minutes. Stir in the toasted pecans and salt, and cook 1-2 minutes more. Remove from the heat and whisk in the butter and whiskey until smooth. The sauce may thicken upon standing, but can be rewarmed over low heat.
To prepare the fish, combine the oil, paprika, thyme, garlic powder, salt and pepper in a bowl and whisk to blend. Pat the mixture over both sides of the fish.
Oil the grates of the grill. Grill until the fish is cooked through and the fillets release easily, about 3 minutes per side. Serve over the dirty rice and topped with the warm praline sauce.
Tuesday, September 20, 2011
Sour Cream Chicken Enchiladas

Lisa, in a quest to replicate the North Texas standard enchilada recipe from her home in Manhattan, totally nailed it.
To make this as written does take awhile. Since I was craving some kitchen time, I quite enjoyed the multi steps but there are ways to cut down on time without sacrificing the taste. For one, use shredded chicken from a rotisserie chicken instead of making your own will shave a lot of time off (even better if you have leftover chicken you can throw in!). This is also another recipe in which I was thankful for my immersion blender. I get more use out of that than my blender - so easy and quick! I also didn't easily find fresh tomatillos so I used canned - that also cuts down on time and effort!
After finishing the sauce, I took a taste and grinned. Jason came through the kitchen and I asked him to taste it. I got a "that's good" in return (which is a rare comment coming from him!). Judging by the silence in the house as we ate, I call this one a winner. Give it a try!
Sour Cream Chicken Enchiladas
For the filling:
Four boneless, skinless chicken breasts
1 teaspoon salt
1 teaspoon black pepper
1 tablespoon olive oil
1/2 medium-sized onion, diced (I skipped - don't care for raw onions in my enchiladas)
For the sour cream sauce:
2 cloves of garlic, minced
2 Serrano chiles, diced
2 tablespoons of butter
2 tablespoons of flour
2 cups of chicken broth
2 cups of sour cream
1 teaspoon of cumin
1/4 cup chopped cilantro
8 fresh tomatillos, husks removed and cut in half or one 10 oz. can of tomatillos
Dash of cayenne
Salt and pepper to taste
For the enchiladas
12 corn tortillas
1 tablespoon of canola oil
2 cups shredded Monterey Jack cheese
1/2 cup chopped cilantro
Preheat the oven to 350 degrees.
Sprinkle the chicken breasts on each side with the salt and black pepper. In a large cast-iron set on medium heat, and cook the chicken breasts on each side for three minutes. Place in the oven and bake for 30 minutes. When the chicken is done, take the chicken out of the oven and let cool. Then shred with two forks. Keep the oven on as you’ll be using it again.
While the chicken is baking, in a pot melt the butter. Throw in the diced Serrano chiles and cook until soft, about three or four minutes. Add the minced garlic and cook for another minute. Add the flour and cook for one more minute. Pour the chicken broth into the pot, and whisking constantly cook until chicken broth has thickened. Stir in the sour cream, cumin, cayenne and cilantro. Remove from heat.
If using fresh tomatillos, place them under the broiler on a foil-lined sheet and cook on each side until blackened, about four minutes per side. Place in a blender along with the sour cream sauce and puree into smooth. If using canned tomatillos, skip the broiler step and just place them in the blender with the sour cream sauce and proceed. (if you have an immersion blender, just add the tomatillos to your sour cream sauce and blend it that way)
Heat the canola oil in a skillet and cook the corn tortillas on each side a couple of minutes until soft. Wrap in a cloth to keep warm as you continue to cook all 12.
To assemble the enchiladas, pour one cup of the sour cream sauce in the bottom of a casserole pan. Take each corn tortilla and place in the middle about 1/3 cup of shredded chicken, 1 teaspoon of diced onions and 1 tablespoon of cheese.
Roll the tortillas around the filling and place the rolled tortillas seam side down in the casserole dish (I just reused my cast iron skillet to save dishes). Cover the enchiladas with the remaining sauce and cheese and bake at 350 for 25 minutes or until top is brown and bubbling.
Serve topped with chopped cilantro. Makes 12 enchiladas.
Monday, September 19, 2011
One Minute Taco Seasoning

This taco seasoning was actually for dinner the night I got sick and I never had the chance to post it. I've often wondered why people pick up the little packets of taco seasoning at the store. They are cheap, typically less than a buck, but they are SO high in sodium and who knows what else. Just about anyone with a basic spice cabinet has the stuff to make their own taco seasoning at home in less than a minute. And for pennies! This recipe is easy to double/triple and keep on hand for a later date, too.
I think this is a pretty mild seasoning - feel free to add more kick to your liking (or leave out the red peppers all together). I've made tacos for the kids I work with several times and have used this recipe (cut down a bit on the red pepper) and not a one has complained. Since spices are pretty and fun to measure, this is a great meal your child would help with.
Recipe comes from All Recipes.
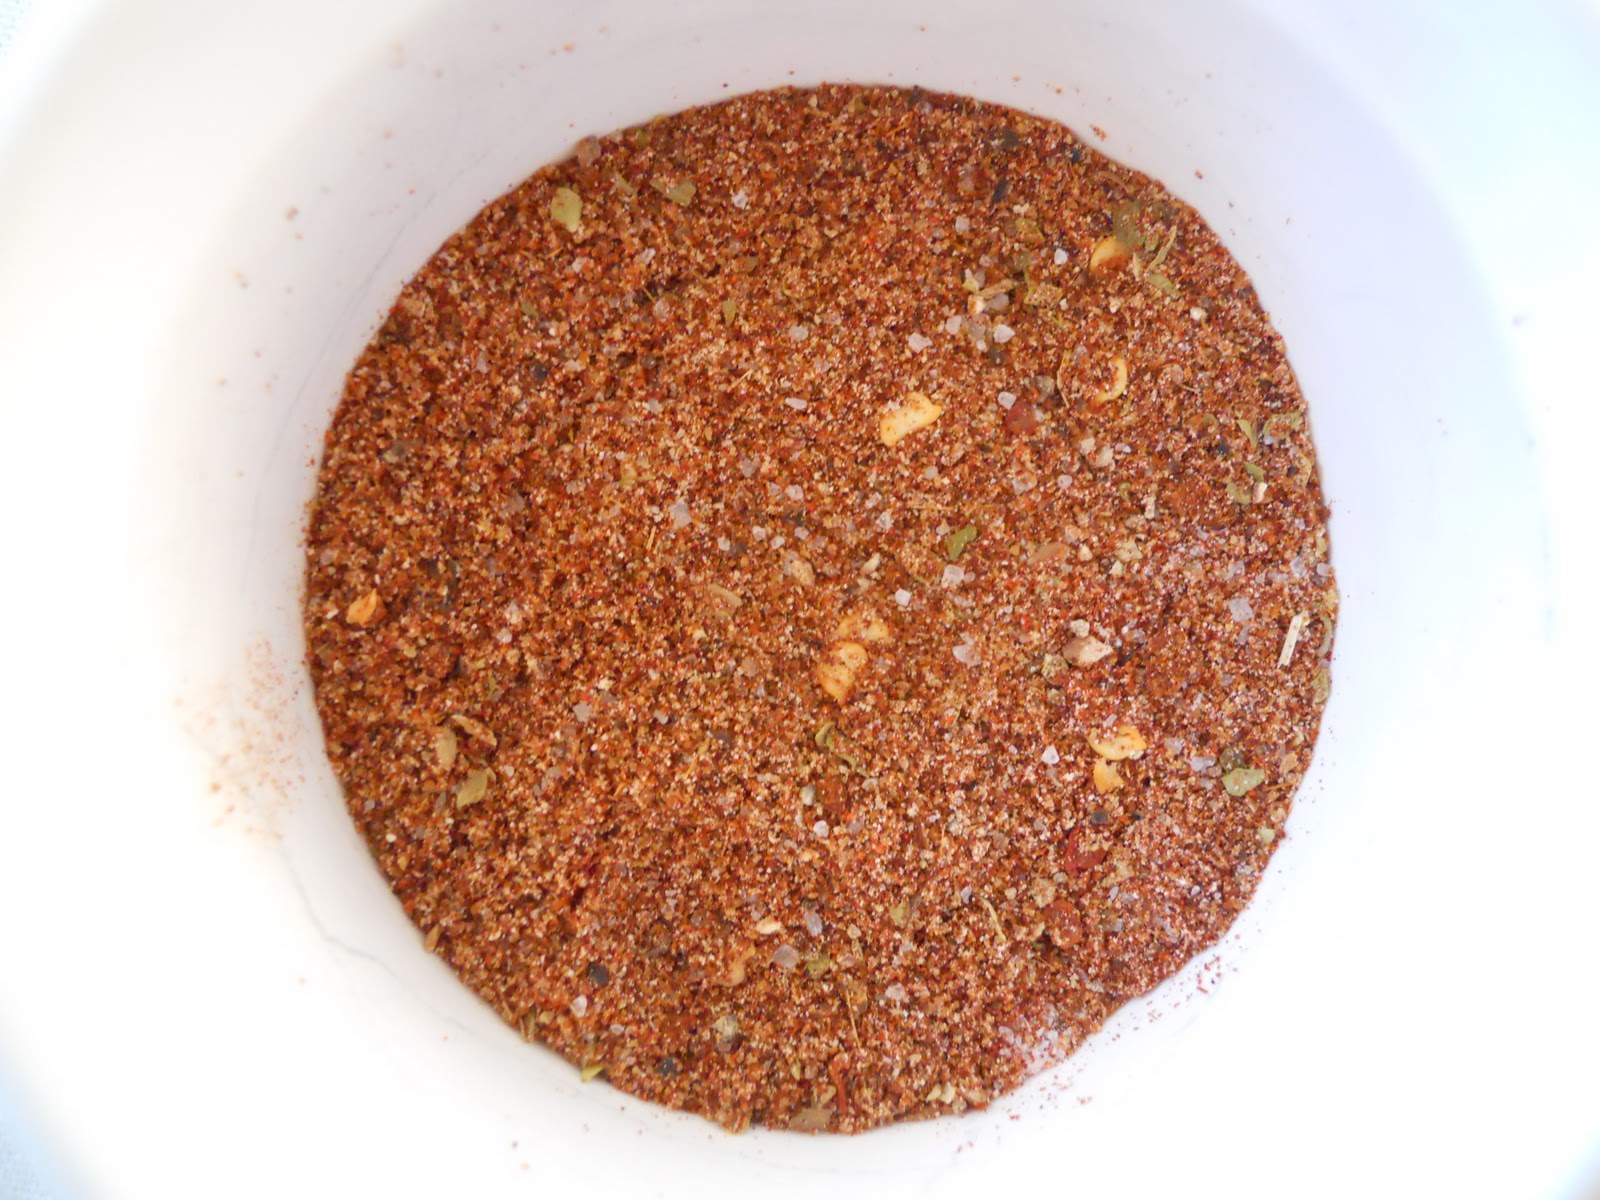
1 tablespoon chili powder
1/4 teaspoon garlic powder
1/4 teaspoon onion powder
1/4 teaspoon crushed red pepper flakes
1/4 teaspoon dried oregano
1/2 teaspoon paprika
1 1/2 teaspoons ground cumin
1 teaspoon sea salt
1 teaspoon black pepper
In a small bowl, mix together chili powder, garlic powder, onion powder, red pepper flakes, oregano, paprika, cumin, salt and pepper. Store in an airtight container.
*This will make about 3 tablespoons. Use 2-3 tablespoons seasoning mix per 1 pound browned ground beef/turkey, plus 1/2 - 2/3 cup water. Just like you would with a seasoning packet.
Subscribe to:
Posts
(
Atom
)


 Posts
Posts


